分类:linux日期:2020-04-07 - 11:25:15评论:1条作者:老谢
首先要确认Nginx有没有编译stream模块进去,使用nginx -V来查看,如果看到–with-stream则表示编译进去了,如果没用重新编译加入stream参数即可,配置字段要加到nginx.conf下面:
stream {
        server {
                listen 12345;
                proxy_pass 1.1.1.1:1111;
                proxy_buffer_size 512k;
                proxy_connect_timeout 30s;
                proxy_timeout 30s;
                #allow 127.0.0.0/24;
                #deny all;
        }
                server {
                listen 1083;
                proxy_pass 2.2.2.2:1080;
                proxy_buffer_size 512k;
                proxy_connect_timeout 30s;
                proxy_timeout 30s;
                #allow 127.0.0.0/24;
                #deny all;
        }
} |
stream {
server {
listen 12345;
proxy_pass 1.1.1.1:1111;
proxy_buffer_size 512k;
proxy_connect_timeout 30s;
proxy_timeout 30s;
#allow 127.0.0.0/24;
#deny all;
}
server {
listen 1083;
proxy_pass 2.2.2.2:1080;
proxy_buffer_size 512k;
proxy_connect_timeout 30s;
proxy_timeout 30s;
#allow 127.0.0.0/24;
#deny all;
}
}
listen:后面填写源端口(也就是当前服务器端口),默认协议为TCP,可以指定为
proxy_connect_timeout:连接超时时间
proxy_timeout:超时时间
proxy_pass:填写转发目标的IP及端口号
分类:网站技术日期:2019-07-15 - 0:54:52评论:3条作者:老谢
闲来无事折腾一波,好久没折腾Nginx了。
高并发网站架构的核心原则其实就一句话”把所有的用户访问请求都尽量往前推“,即:能缓存在用户电脑本地的,就不要让他去访问 CDN。 能缓存 CDN 服务器上的,就不要让 CDN 去访问源(静态服务器)了。能访问静态服务器的,就不要去访问动态服务器。以此类推:能不访问数据库和存储就一定不要去访问数据库和存储。
安装ngx_cache_purge模块
ngx_cache_purge是为了后面配合插件完成自动刷新使用,ngx_cache_purge是个控制Nginx缓存的模块。
军哥LNMP一键包默认不编译ngx_cache_purge模块,所以需要自行编译该模块进去,使用nginx -V命令可以看到当前的编译参数,编译该模块只需要增添–-add-module=../ngx_cache_purge-2.3参数即可,顺便升级一波Nginx。
wget http://nginx.org/download/nginx-1.17.0.tar.gz
wget http://labs.frickle.com/files/ngx_cache_purge-2.3.tar.gz
tar -zxf nginx-1.17.0.tar.gz
tar -zxf ngx_cache_purge-2.3.tar.gz
cd nginx-1.17.0
./configure --user=www --group=www --prefix=/usr/local/nginx --with-http_stub_status_module --with-http_ssl_module --with-http_v2_module --with-http_gzip_static_module --with-http_sub_module --with-stream --with-stream_ssl_module --with-openssl=/root/lnmp1.5/src/openssl-1.0.2o --with-ld-opt=-Wl,-rpath,/usr/local/luajit/lib --add-module=/root/lnmp1.5/src/lua-nginx-module-0.10.11 --add-module=/root/lnmp1.5/src/ngx_devel_kit-0.3.0 --add-module=/root/ngx_cache_purge-2.3
make
make upgrade
/etc/init.d/nginx stop
cp objs/nginx /usr/local/nginx/sbin/nginx
/etc/init.d/nginx start |
wget http://nginx.org/download/nginx-1.17.0.tar.gz
wget http://labs.frickle.com/files/ngx_cache_purge-2.3.tar.gz
tar -zxf nginx-1.17.0.tar.gz
tar -zxf ngx_cache_purge-2.3.tar.gz
cd nginx-1.17.0
./configure --user=www --group=www --prefix=/usr/local/nginx --with-http_stub_status_module --with-http_ssl_module --with-http_v2_module --with-http_gzip_static_module --with-http_sub_module --with-stream --with-stream_ssl_module --with-openssl=/root/lnmp1.5/src/openssl-1.0.2o --with-ld-opt=-Wl,-rpath,/usr/local/luajit/lib --add-module=/root/lnmp1.5/src/lua-nginx-module-0.10.11 --add-module=/root/lnmp1.5/src/ngx_devel_kit-0.3.0 --add-module=/root/ngx_cache_purge-2.3
make
make upgrade
/etc/init.d/nginx stop
cp objs/nginx /usr/local/nginx/sbin/nginx
/etc/init.d/nginx start
继续阅读…
分类:运维技术日期:2013-08-31 - 22:58:15评论:1条作者:老谢
某客户由于域名在备案,国内产品没办法使用80直接访问,但是又不想再把数据搬到国外来回折腾,这种情况可以使用反代解决,不过前提要是VPS,因为虚拟主机似乎没办法自己自定义web端口,本文就用我的电信ADSL网络试验。
安装Nginx
CentOS编译安装Nginx(附:管理脚本)
配置ADSL
配置web服务,并在路由器配置对应端口转发,我就用8888端口为例(我就不说我的WIFI密码是88888888了~)
配置反代
nginx.conf
server
{
listen 80;
server_name demo.com;
location / {
proxy_pass http://adsl:8888/;
proxy_redirect off;
proxy_set_header Host $host;
proxy_set_header X-Real-IP $remote_addr;
proxy_set_header X-Forwarded-For $proxy_add_x_forwarded_for;
}
}
配置成功

已经可以成功访问到国内的数据,反代成功
分类:运维技术日期:2012-03-15 - 20:41:49评论:6条作者:老谢
咦?我不是该在学习ccnp的路由部分么?为什么又搞上nginx了?啊!蛋开始痛了。。写完这篇继续看我的np去,Orz…
安装Nginx — 更详细的请看:http://www.xj123.info/2416.html
wget ftp://ftp.csx.cam.ac.uk/pub/software/programming/pcre/pcre-8.30.tar.gz
tar -zxf pcre-8.30.tar.gz
wget http://sourceforge.net/projects/libpng/files/zlib/1.2.6/zlib-1.2.6.tar.gz/download
tar -zxf zlib-1.2.6.tar.gz
wget http://labs.frickle.com/files/ngx_cache_purge-1.5.tar.gz
tar -zxf ngx_cache_purge-1.5.tar.gz
wget http://nginx.org/download/nginx-1.0.13.tar.gz
tar -zxf nginx-1.0.13.tar.gz
cd nginx-1.0.13
./configure --prefix=/usr/local/nginx \
--user=www \
--group=www \
--with-http_ssl_module \
--with-http_dav_module \
--with-http_flv_module \
--with-http_realip_module \
--with-http_gzip_static_module \
--with-http_stub_status_module \
--with-mail --with-mail_ssl_module \
--with-pcre=../pcre-8.30 \
--with-zlib=../zlib-1.2.6 \
--add-module=../ngx_cache_purge-1.5 \
--with-debug \
--http-client-body-temp-path=/var/tmp/nginx/client \
--http-proxy-temp-path=/var/tmp/nginx/proxy \
--http-fastcgi-temp-path=/var/tmp/nginx/fastcgi \
--http-uwsgi-temp-path=/var/tmp/nginx/uwsgi \
--http-scgi-temp-path=/var/tmp/nginx/scgi
make && make install
ln -s /usr/local/nginx/sbin/nginx /usr/sbin/
mkdir /var/tmp/nginx/cache |
wget ftp://ftp.csx.cam.ac.uk/pub/software/programming/pcre/pcre-8.30.tar.gz
tar -zxf pcre-8.30.tar.gz
wget http://sourceforge.net/projects/libpng/files/zlib/1.2.6/zlib-1.2.6.tar.gz/download
tar -zxf zlib-1.2.6.tar.gz
wget http://labs.frickle.com/files/ngx_cache_purge-1.5.tar.gz
tar -zxf ngx_cache_purge-1.5.tar.gz
wget http://nginx.org/download/nginx-1.0.13.tar.gz
tar -zxf nginx-1.0.13.tar.gz
cd nginx-1.0.13
./configure --prefix=/usr/local/nginx \
--user=www \
--group=www \
--with-http_ssl_module \
--with-http_dav_module \
--with-http_flv_module \
--with-http_realip_module \
--with-http_gzip_static_module \
--with-http_stub_status_module \
--with-mail --with-mail_ssl_module \
--with-pcre=../pcre-8.30 \
--with-zlib=../zlib-1.2.6 \
--add-module=../ngx_cache_purge-1.5 \
--with-debug \
--http-client-body-temp-path=/var/tmp/nginx/client \
--http-proxy-temp-path=/var/tmp/nginx/proxy \
--http-fastcgi-temp-path=/var/tmp/nginx/fastcgi \
--http-uwsgi-temp-path=/var/tmp/nginx/uwsgi \
--http-scgi-temp-path=/var/tmp/nginx/scgi
make && make install
ln -s /usr/local/nginx/sbin/nginx /usr/sbin/
mkdir /var/tmp/nginx/cache
配置文件直接贴出来了,俺也不怕丑了。。(#号后面的内容为注释)
继续阅读…
分类:运维技术日期:2012-03-04 - 0:00:36评论:2条作者:老谢
今天对nginx.conf进行修改,保存后进行语法检查,配置应该没问题,但是提示下面的信息,瞬间忧桑了,
nginx: [emerg] host not found in upstream “demo1.xj123.info” in /usr/local/nginx
nginx: configuration file /usr/local/nginx/conf/nginx.conf test failed
其中demo1.xj123.info是我的博客后端之一,从提示的错误和网上搜索一番来看,应该是找不到主机,于是ping了一下demo1.xj123.info,结果是可以ping通,这就令我费解了,而且cat /etc/resolv.conf里面的nameserver是正确的。
实在没头绪了,又敲了一次nginx -t竟然提示成功。
nginx: the configuration file /usr/local/nginx/conf/nginx.conf syntax is ok
nginx: configuration file /usr/local/nginx/conf/nginx.conf test is successful
最后:这个问题就是由于找不到主机导致的,如果担心类似问题,可以修改hosts文件
分类:运维技术日期:2012-03-03 - 15:04:43评论:4条作者:老谢
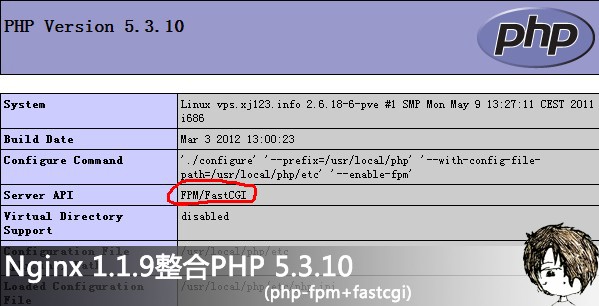
本文只介绍PHP的安装以及整合到Nginx,至于Nginx的安装教程请看:CentOS编译安装Nginx(附:管理脚本)

wget http://vps.xj123.info/usr/lamp/php-5.3.10.tar.gz
tar -zxf php-5.3.10.tar.gz
cd php-5.3.10
./configure --prefix=/usr/local/php --with-config-file-path=/usr/local/php/etc --enable-fpm
make && make install
cp php.ini-production /usr/local/php/etc/php.ini |
wget http://vps.xj123.info/usr/lamp/php-5.3.10.tar.gz
tar -zxf php-5.3.10.tar.gz
cd php-5.3.10
./configure --prefix=/usr/local/php --with-config-file-path=/usr/local/php/etc --enable-fpm
make && make install
cp php.ini-production /usr/local/php/etc/php.ini
继续阅读…
分类:运维技术日期:2012-03-01 - 22:51:31评论:3条作者:老谢
做网站,有些目录必须要有写入权限,网站才能运行,但又担心别有用心的人在该目录上传.php的可执行文件,这样就有安全隐患了,下面例子为如何禁止某个目录执行.php的文件,代码摘自:http://who0168.blog.51cto.com/253401/577309
apache
<Directory /usr/local/apache/htdocs/bbs/data>
php_flag engine off
</Directory>
<Directory ~ "^/home/centos/web/data">
 <Files ~ ".php">
 Order allow,deny
 Deny from all
 </Files>
</Directory> |
<Directory /usr/local/apache/htdocs/bbs/data>
php_flag engine off
</Directory>
<Directory ~ "^/home/centos/web/data">
<Files ~ ".php">
Order allow,deny
Deny from all
</Files>
</Directory>
nginx
location /data/ {
location ~ .*\.(php)?$ {
deny all;
}
} |
location /data/ {
location ~ .*\.(php)?$ {
deny all;
}
}
分类:运维技术日期:2012-02-25 - 11:07:36评论:2条作者:老谢
Apache的目录浏览默认是打开的,而Nginx的目录浏览默认是关闭的,演示传送门 ==> VPS软件下载,
要打开该功能,非常简单,只需要添加autoindex on;参数即可,下面是vps.xj123.info的例子:
nginx.conf
server {
listen 80;
server_name vps.xj123.info;
autoindex on;
autoindex_exact_size off;
autoindex_localtime on;
location / {
root html/vps;
index index.html index.htm;
}
}
autoindex_exact_size off;
默认为on,显示出文件的确切大小,单位是bytes。
改为off后,显示出文件的大概大小,单位是kB或者MB或者GB
autoindex_localtime on;
默认为off,显示的文件时间为GMT时间。
改为on后,显示的文件时间为文件的服务器时间
分类:运维技术日期:2012-02-24 - 22:42:34评论:2条作者:老谢
启动Nginx
/usr/local/nginx/sbin/nginx -c /usr/local/nginx/conf/nginx.conf
停止Nginx
可以发送向通信号给Nginx主进程的方式来停止Nginx,操作如下:
CentOS release 5.7 (Final)
[root@vps ~]# ps -ef | grep nginx #查询master process主进程号
root 3266 1 0 Feb20 ? 00:00:00 nginx: master process /usr/local/nginx/sbin/nginx -c /usr/local/nginx/conf/nginx.conf
nobody 3267 3266 0 Feb20 ? 00:00:01 nginx: worker process
root 9282 9239 0 20:51 pts/0 00:00:00 grep nginx
[root@vps ~]# kill -QUIT 3266 #从容停止Nginx
继续阅读…


最新评论
Josephlit:不常看到, 没有多余矫饰的表达。...
雨帆:年纪越大越抠是真的,我现在就降级到了...
秦大叔:现在都是够用就好,不想太折腾了。
Andy烧麦:X1C 5th 2017年-2022年,走南闯北...
王叨叨:自从换了typecho,博客也不怎么出问...
王叨叨:我准备给我的老笔记本搞一个linux系...
大D:台式机现在只能是AMD YES!
springwood:查询了一下,ThinkPad x1c 9th ...
黑石:特斯拉和小米,选哪个?不是很懂车,就...
Huo:电车的确开着舒服,也是纠结想换电车,...